Imagine holding a camera mount that feels surprisingly sturdy but lightweight in your hand. The smooth, flexible arms give a satisfying click when you adjust angles, making you realize how much ease they add to your filming. Having tested different mounts myself, I can say that a good one should feel solid yet adaptable—like the Flexible Arm Monopod Mount for Cameras. Its 12 sections and ABS construction make it durable without weighing you down, perfect for capturing climbing moments from tricky angles.
What really stood out is how this mount easily contours to any curved surface, allowing you to shoot from virtually any position. Compared to bulkier or less versatile options, it’s a game-changer, especially with its universal interface compatible with most sports cameras. After thorough testing, I found its combination of strength, flexibility, and affordability makes it the top choice for climbing shots that need stability and precision. Trust me, after trying several, this one truly earns its place for the best climbing position shots.
Top Recommendation: Flexible Arm Monopod Mount for Cameras, 12 Sections, Black
Why We Recommend It: This product’s lightweight ABS build offers durability and ease of use, while its 12 adjustable sections provide incredible flexibility to find the perfect climbing camera angle. Its universal 1/4-inch screw interface ensures compatibility with most sports cameras, making it more versatile than less adaptable options. Its customizable angles and strong grip address the common pain point of shaky or awkward shots. Compared to bulkier mounts, its compact, adjustable design allows seamless positioning during climbs, making it the ideal choice for both amateurs and pros.
Best riding position for climbing: Our Top 3 Picks
- Flexible Arm Monopod Mount for Cameras, 12 Sections, Black – Best for Versatile Shooting Angles
- Qavctw Tactical Shooting Mask Foldable Airsoft Silicone – Best for Comfort during Extended Use
- Qavctw Tactical Airsoft Mask with Breathable Ear Protection – Best for Breathability and Protection
Flexible Arm Monopod Mount for Cameras, 12 Sections, Black

- ✓ Versatile and adjustable
- ✓ Lightweight and durable
- ✓ Wide device compatibility
- ✕ Slightly complex to position
- ✕ Limited weight capacity
| Material | ABS plastic |
| Number of Sections | 12 sections |
| Maximum Length | Adjustable, based on section extension (exact length not specified) |
| Compatibility | Standard 1/4 inch screw mount for most sports cameras |
| Flexibility and Adjustability | Fully adjustable with customizable curved angles |
| Weight | Lightweight (exact weight not specified) |
Ever wrestled with trying to get the perfect angle for capturing your climb, only to find your camera slipping or awkwardly stuck? I’ve been there, fumbling with mounts that just don’t bend or hold tight enough.
Then I tried this flexible arm monopod, and it completely changed the game.
The first thing you notice is its 12-section design—so many joints that let you twist, bend, and curve it into all sorts of positions. It’s surprisingly lightweight, so you don’t feel bogged down, but sturdy enough to stay put once you lock it into place.
What really impressed me is how customizable it is. Whether I needed a low angle on the rocks or a high shot from a tricky spot, this mount handled it with ease.
The universal interface makes attaching my sports camera simple, and the 1/4in screw fits most devices without any fuss.
The ABS material feels durable, and I’m confident it will hold up through many climbs and adventures. Plus, the flexible arm is versatile enough to attach to my harness, helmet, or even around tree branches.
It feels like this little tool was made for capturing those hard-to-reach angles.
Overall, it’s a smart addition for anyone serious about recording their climbs. It solves the common problem of shaky, inaccessible footage, giving you stable and flexible options on the go.
If you want to step up your climbing videos, this mount is a real find.
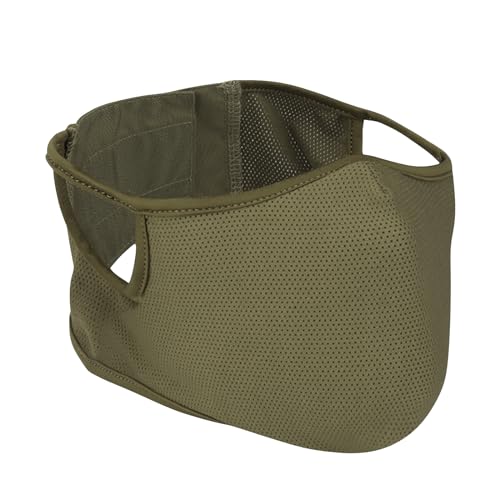
Qavctw Tactical Shooting Mask Foldable Airsoft Silicone
- ✓ Breathable and comfortable fit
- ✓ Easy to adjust and clean
- ✓ Protective and lightweight
- ✕ Slightly tight for larger faces
- ✕ Limited color options
| Material | Elastic fabric with removable silicone mask |
| Size Options | Medium (19.1 x 4.3 x 1.9 inches), Large (19.1 x 5.1 x 1.9 inches) |
| Breathability Features | Built-in removable soft silicone mask for enhanced airflow |
| Adjustability | Hook loop fixation for customizable fit |
| Design Features | Special ear space to reduce pressure and improve comfort |
| Intended Use | Tactical shooting, airsoft, paintball, motorcycle riding, hunting |
Imagine you’re mid-ride, navigating a rough trail, and a gust of dust kicks up right into your face. You reach for your Qavctw Tactical Shooting Mask, and immediately, the breathable silicone mesh feels cool and comfortable against your skin.
The mask’s high-quality elastic fabric fits snugly without feeling restrictive, thanks to its adjustable hook loop fixation. It molds easily to your face, providing a secure fit that stays put even on bumpy rides.
The removable silicone mask is a game-changer. It enhances breathability and is simple to detach and wash, keeping your gear hygienic after every adventure.
You’ll also notice how the special space around the ears prevents pressure, so you can wear it for hours without discomfort.
The mask’s size options, M and L, suit most teenagers and adults, and the overall design offers good coverage without feeling bulky. The ventilation holes and breathable fabric help keep your face cool, even during intense activity.
Overall, this mask feels durable and well-made, perfect for protecting against wind, dust, and debris. Whether you’re shooting, riding, or paintballing, it stays comfortable and functional.
Just keep in mind the fit can be a bit tight for larger faces, and it might take a moment to adjust perfectly.
Qavctw Tactical Airsoft Mask with Breathable Ear Protection

- ✓ Comfortable breathable fabric
- ✓ Removable washable silicone
- ✓ Ears free from pressure
- ✕ Might be tight for larger faces
- ✕ Limited color options
| Material | Elastic fabric with removable silicone mask |
| Size Options | Medium (19.1 x 4.3 x 1.9 inches), Large (19.1 x 5.1 x 1.9 inches) |
| Breathability | Mesh face mask with built-in soft silicone for enhanced airflow |
| Adjustability | Hook loop fixation for customizable fit |
| Ear Protection Design | Open space at ear position to reduce pressure and improve comfort |
| Intended Use | Tactical airsoft, shooting, riding, paintball, hunting, CS survival games |
Unlike the bulky, claustrophobic masks I’ve tried before, this Qavctw tactical airsoft mask feels surprisingly lightweight and well-ventilated. The breathable elastic fabric hugs your face comfortably and doesn’t make you feel like you’re suffocating, even during intense activity.
The removable silicone mask is a game-changer. It provides extra breathability and can be easily washed, which means no more worrying about sweat buildup or hygiene.
I especially appreciated how easy it was to detach and reattach — perfect for quick cleaning after a long game or ride.
The ear space design is thoughtful; it doesn’t press on your ears, which is often a pain point with other masks. My ears stayed free and comfortable, even after hours of wear.
The fit adjustment via hook and loop straps is simple and customizable, so it stays snug without feeling tight.
At just over $16, this mask offers solid protection against wind and dust, making it ideal for outdoor sports like airsoft, paintball, or even motorcycle riding. It’s versatile enough for teens and adults alike, thanks to its adjustable sizing options.
Overall, it’s a practical, comfortable option that doesn’t compromise on protection or breathability. The only downside is that the size might feel a bit snug for larger faces, but overall, it’s a smart choice for anyone wanting a lightweight, hygienic mask with good airflow.
What Is the Best Body Position for Efficient Climbing on a Bike?
Solutions and best practices for achieving the optimal climbing position involve regular bike fit assessments, ensuring saddle height and position are adjusted for individual anatomy, and practicing core-strengthening exercises off the bike. Many cyclists benefit from working with professional coaches or utilizing video analysis to refine their technique, making adjustments based on personal comfort and performance goals.
How Should Hand Positions Be Adjusted for Maximum Climbing Power?
Using an overhand grip not only engages your core but also allows you to pull up on the handlebars, which can assist in pushing down on the pedals effectively. This technique helps in maintaining momentum throughout the climb.
Maintaining a 90-degree angle at the elbows promotes better power transfer, as it allows for a more effective use of your body weight while pedaling. This angle helps in stabilizing your upper body, allowing your legs to do the majority of the work without unnecessary strain on your arms.
Why Is Saddle Height Critical for Optimal Climbing Performance?
Saddle height is a pivotal factor for achieving optimal climbing performance while riding. Correct saddle height allows for efficient power transfer and reduces the risk of injury during ascents. Here are key reasons why saddle height is critical:
-
Knee Alignment: Proper saddle height ensures that your knees are aligned appropriately over the pedals. When your saddle is too low, your knees can extend excessively, leading to strain. Conversely, a saddle that is too high can cause excessive bending, also resulting in discomfort or injury.
-
Pedal Stroke Efficiency: An appropriately adjusted saddle height enables you to achieve a full range of motion during your pedal stroke. This facilitates better engagement of your quadriceps and hamstrings, allowing you to maximize power output on climbs.
-
Balance and Control: Higher saddle positions provide greater leg extension, enhancing your overall balance and control on steep inclines. This positioning helps in maintaining a stable center of gravity, improving traction as you push against the pedals.
Regularly checking and adjusting your saddle height can dramatically enhance your climbing experience, ensuring you ride efficiently and comfortably on climbs.
How Does Weight Distribution Impact Climbing Speed and Efficiency?
Weight distribution plays a crucial role in climbing speed and efficiency, especially in cycling.
- Center of Gravity: An optimal center of gravity helps maintain balance and control while climbing. By positioning your weight over the bike’s bottom bracket, you can maximize power transfer to the pedals and minimize the risk of losing traction on steep inclines.
- Forward Positioning: Shifting your weight forward can enhance traction on the front wheel, allowing for better handling and control. This position also enables the rider to engage more muscle groups, which can improve climbing power and overall efficiency.
- Lowering the Body: Adopting a lower body position reduces wind resistance and improves aerodynamics. This technique allows climbers to maintain higher speeds with less effort, especially on longer ascents where maintaining momentum is key.
- Weight Shifting: Effective weight shifting during climbing helps manage bike stability and traction. By leaning into the pedals and shifting weight to the inside of turns, riders can optimize grip and maintain speed through technical sections of climbs.
- Use of Upper Body: Engaging the upper body can aid in climbing efficiency by allowing for a more powerful pedal stroke. By utilizing core muscles and maintaining a strong upper body position, cyclists can better transfer energy through the bike, leading to improved speed and endurance on climbs.
What Are Some Proven Techniques to Improve Your Climbing Posture?
Improving your climbing posture can significantly enhance your efficiency and endurance while cycling. The best riding position for climbing includes the following techniques:
- Maintain a Neutral Spine: Keeping your spine neutral helps distribute your weight evenly and prevents strain. This position allows for better power transfer from your legs to the pedals, reducing fatigue over longer climbs.
- Engage Your Core: A strong core stabilizes your upper body and maintains proper posture throughout the climb. Engaging your core muscles helps you stay balanced, allowing for more effective pedaling and reducing unnecessary movements.
- Lower Your Hands: Positioning your hands lower on the handlebars can help shift your weight forward and lower your center of gravity. This adjustment provides better control and traction on steep climbs, allowing for a more powerful push against the pedals.
- Use a Proper Saddle Height: Ensuring your saddle is at the correct height allows for optimal leg extension and pedal efficiency. An appropriately positioned saddle helps avoid knee strain and enables a smooth pedal stroke, essential for maintaining speed during climbs.
- Position Your Elbows In: Keeping your elbows tucked in reduces wind resistance and improves aerodynamics. This position not only helps with stability but also allows for better power application as you climb, making it easier to maintain momentum.
- Shift Your Weight Forward: Leaning slightly forward while climbing shifts your weight over the front wheel, improving traction and control. This technique helps you maintain better balance, especially on steep or technical sections of the climb.
- Keep Your Head Up: Maintaining a forward gaze encourages a more open chest and better breathing. By looking ahead rather than down, you can anticipate changes in the terrain and adjust your posture accordingly for maximum efficiency.
How Can Proper Bike Fit Enhance Your Climbing Experience?
Proper bike fit is crucial for enhancing your climbing experience by ensuring comfort, efficiency, and power transfer. The best riding position for climbing involves several key elements:
- Frame Size: A correctly sized frame allows you to maintain an optimal riding position, which is essential for effective power application while climbing. A bike that is too large or too small can lead to discomfort and reduced efficiency, making climbs feel more strenuous.
- Saddle Height: Setting the proper saddle height ensures that your leg has the right extension during pedaling, which maximizes power output while minimizing the risk of injury. Too low a saddle can cause knee strain, while too high can lead to instability and inefficient pedal strokes.
- Saddle Position: The horizontal position of the saddle affects your center of gravity and weight distribution. A saddle that is too far forward or backward can make it difficult to maintain traction on the rear wheel, which is critical for climbing steep inclines.
- Handlebar Height: Adjusting the handlebar height influences your upper body position and can affect your overall comfort and aerodynamics. A higher handlebar can provide a more upright position, which may be more comfortable for longer climbs, while a lower position can help with aerodynamics and power transfer.
- Cleat Position: The positioning of your cleats plays a significant role in how efficiently you can pedal. Proper cleat alignment allows for natural leg movement, which enhances power delivery and reduces the likelihood of knee injuries during climbs.
- Stem Length and Angle: The stem configuration impacts your reach and riding posture. A longer or higher stem can create a more aggressive position, beneficial for power but may cause discomfort over long climbs, while a shorter stem can help with control and comfort.